How about a Trash Tie giveaway! It's over!

When I first started blogging almost three years ago, I ran across an amazing designer named Heather Bailey. I have lurked on her blog for ages. I downloaded her free pattern for headbands (although being lazy, I have yet to make them). I look to her for design trends and decorating ideas. In essence, I have been stalking her.

Then one day she cam out with these amazing little products called Trash Ties.
What a novel idea! It is a patented wire encased in satin. And they work so well. My kids love it when I use them because there is no cutting elastics out of their hair, they don't pull their hair, and who doesn't love saying "Trash-a-Ties"...the name my girls have so lovingly bestowed upon them.

I have taken some time to get to know my Trash Ties before I gushed about them on here. I am twisting them in and out of my daughters hair like a pro. Anytime I go to do a twisty style, they beg for them rather than my original way of doing things. If that isn't a testament to them, I don't know what is.

And these only get better with time. We have used them so much that the ends are starting to look like little puffs. SO CUTE!

So, in honor of my VERY FAVORITE NEW HAIR STUFF, I am having a little giveaway. One lucky reader and stylist will receive a 25" trash tie in gold. All you have to do is leave a little comment for me and you have to go and check out Heather's Trash Tie site to see the incredible things you can do with these.


Remember, you may only enter once and on Wednesday, July 2nd at 5:00, the contest will be over and the winner will be announced on Independence Day.



ETA: IF you already have Trash Ties, or to see MORE options...Visit THIS link.

Four Messy Piggies All In A Row

Divide the hair in the middle of the head

Part the hair right where the temple starts.


Pull the hair up into a little ponytail being careful to only pull the hair half way through the last time you pull it out.

Repeat until you have four messy ponies (I know I put piggies on the title, it flows much better than ponies)

Curl the ends of the hair.

Fluff hair and spray it.

Add pre-made bows or ribbons for a finishing touch.


Look what you have been up too!

Ladies! Wow! You have been SO busy! I use a lot of exclamation points!!!!!!!!!!!!!!


I just have to say that I am super impressed at your skills. You all have some of the prettiest little girls out there and their hair is stunning to boot! I LOVE seeing these. And I have to just add that I am so flattered by all of the kind words that you have been sending me. Speaking of kind words, if you see me at the grocery store or Target...come say hi!!! I would love to chat!

Michelle sent these in of her daughters. The top picture is a DUAL lattice ponytail. She has some patience...and her daughter does as well. I will show you how to do those twists in another post. SO cute.


Marisa sent some adaptations of some of the styles here. I am LOVING the messy ponytails with the two braids. LOVE IT!!!


Kory sent me some shots of her daughters

Linnea has puffy braids crossing her head at a diagonal.

Mikayla has two French braids tucked up and under and tied them with a ribbon at the bottom and two flowers on the sides.


Lisa sent me these of her camera shy ;) daughter. It is the puffy braids with a zig-zag part.


Andrea sent me some adorable shots of her step-daughter Austin


My old locker partner from high school (how cool is that?!!?!), Gena, sent me this off-shoot of the upside down puffy braids/lattice ponytails

And she also sent me this super cute style that she found over on "Girly Do's"


Kimberly has two pretty princesses. Madison with the messy buns...

...and her daughter Sydney with the lattice ponytails


Karen has a darling variation of the smocking style. She makes it with "Knots". Isn't her Kate beautiful?!?!?!


Anna sent me this one of her little sister where she changed the ponytail part to messy buns! How darling!

THANK YOU!!! THANK YOU!!! THANK YOU!!! For all of your support. I am so excited to see all of these! Keep them coming ladies! Blackeyedsue2@gmail.com. YOU ARE THE BEST!!!

Technique---Knots

I have had quite a few requests for basic techniques. Here is one for "Knots"
I apologize in advance for the flash. I usually turn it off, but since it was starting to get dark, the flash needed to be on.


Start with her hair in a ponytail. This is straight-out-of-the-shower, so there is no hair spray or gel involved. I usually use the product. It makes for a smoother knot.


Slide the tail end of a rat-tailed comb under the center of the ponytail. It makes you feel better if your comb is pink, by-the-way.


Holding tight onto the comb, pull the elastic up, I'd say about 3/4 of an inch.


Now, follow through with your forefinger all the way through the hair.


Flip the hair up and


through the space where your finger is.


Pull the hair all of the way through.


Pick up the ponytail and


split it in half.


Then pull the two sides until the elastic is tight agains the twists.


Then I comb the hair smooth.


Ta dah! A knot!


A twist with well, a twist.

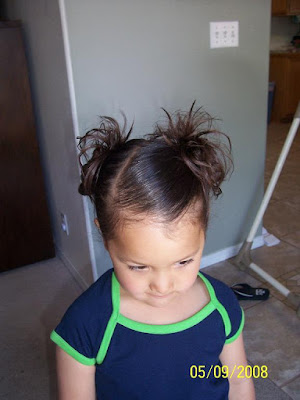
Remember THIS twist tutorial and THIS messy ponytail? Today we combined them.

It was super fun to do such a small twist on Tess's hair. We did this on her sister yesterday using all of her hair, but since Tess has shorter locks, we did it with only half of her hair.


One more...
I did the same thing to Miss Amelia's hair, but it just didn't feel right today, so we did some more...on the bottom. When I pulled the bottom hair together, we just pulled it up to the top twist and put another rubber band. To make it easier, you could just do two messy ponytails and tie ribbons around them individually. Oh, that would be cute! I may have to do that tomorrow. It would give a lot of length to a cute hairstyle!